I.Campaigns cơ bản:
![]()
Quản lý thông tin những chiến dịch bạn sẽ sử dụng cho việc gửi email Marketing
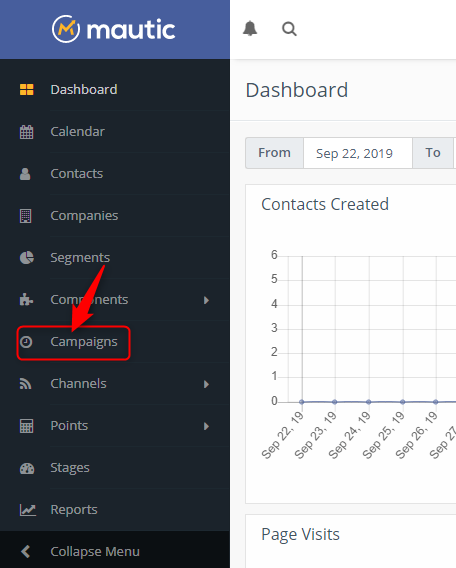
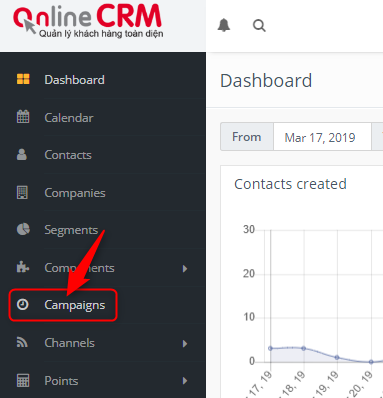
Bước 1: Tại menu chọn “Campaigns”
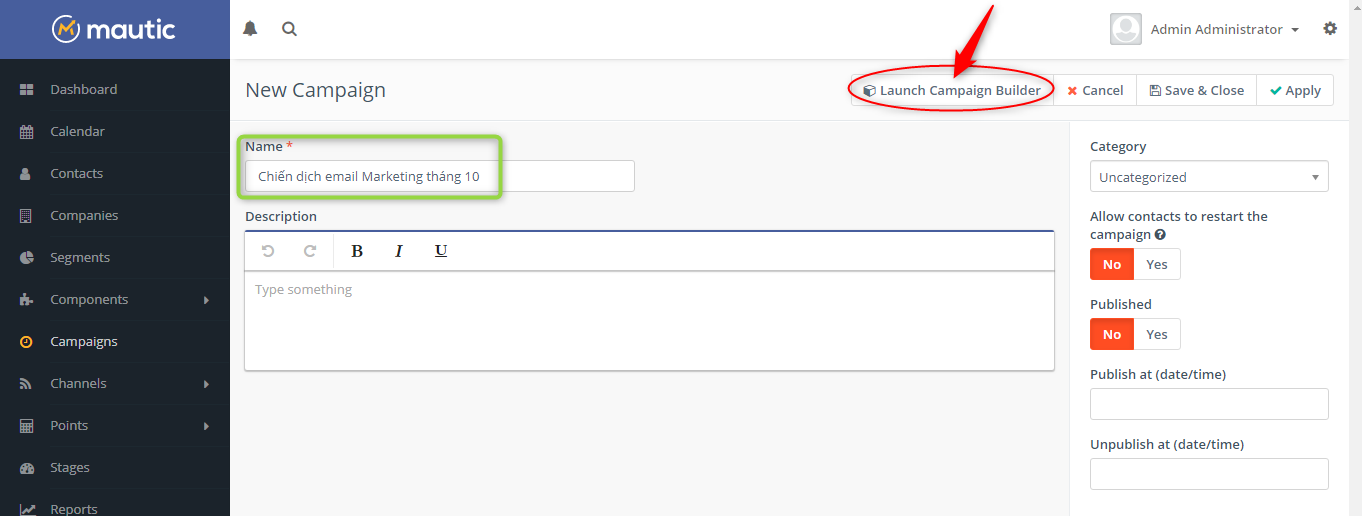
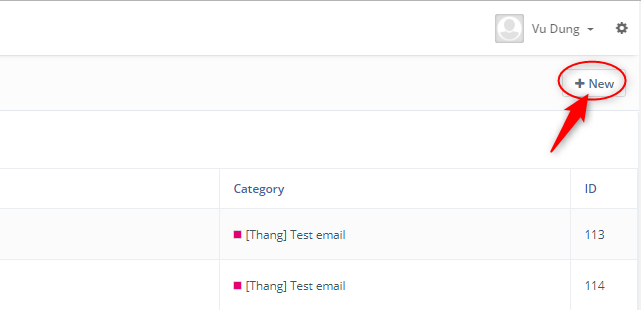
Bước 2: Click “New” để tạo mới 1 Campaigns

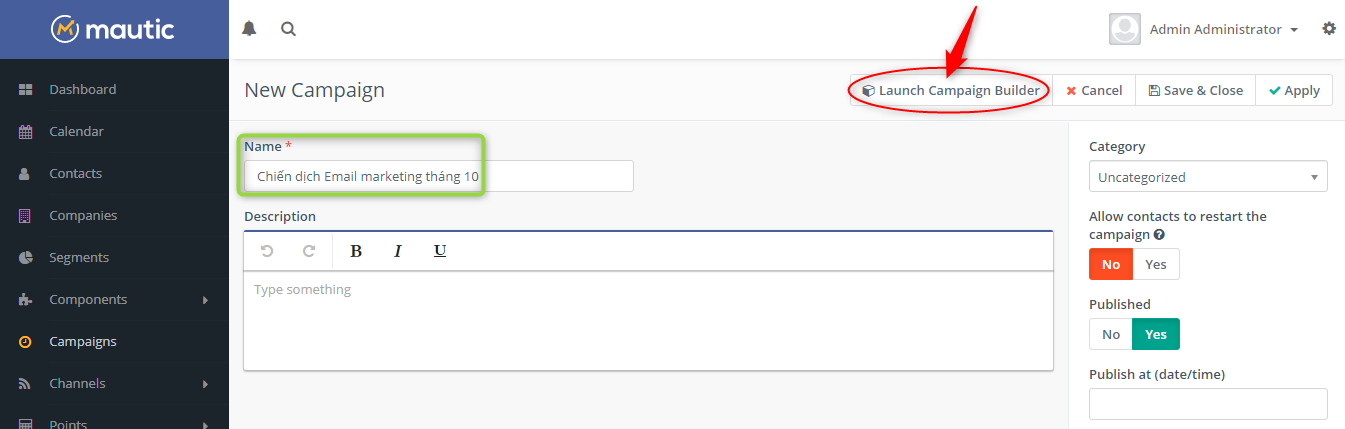
Bước 3: Đặt tên chiến dịch, sau đó nhấn “Launch Campaign Builder” để tiến hành cấu hình cho Campaigns
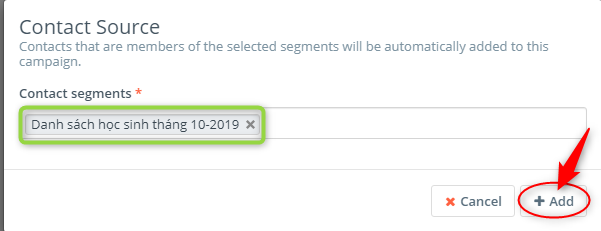
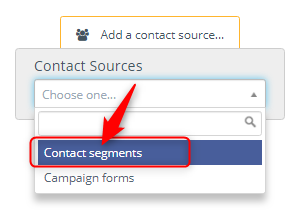
Bước 4: Lựa chọn “Contact Segment”
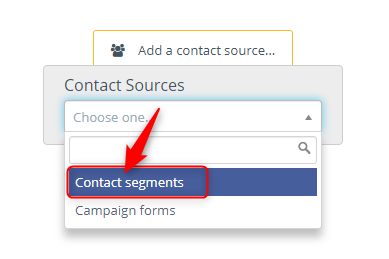
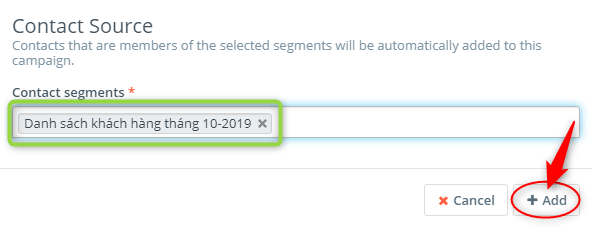
Bước 5: Lựa chọn Segments muốn sử dụng cho chiến dịch, sau đó click “Add”
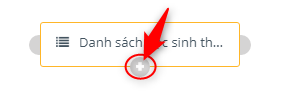
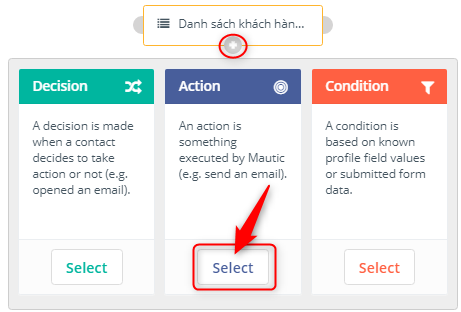
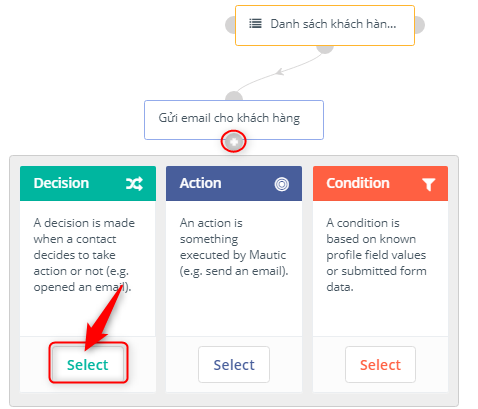
Bước 6: Click vào icon +, tại cột Action chọn “Select” để tiến hành thêm hành động gửi mail cho chiến dịch
Bước 7: Click Select
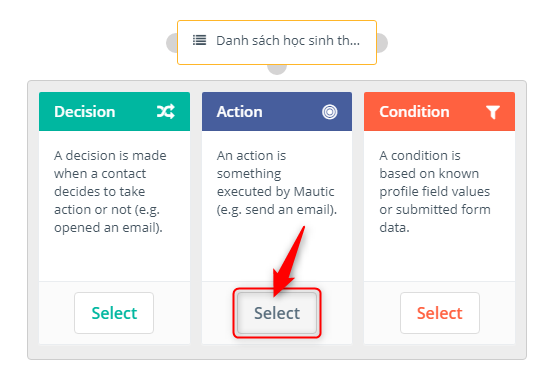
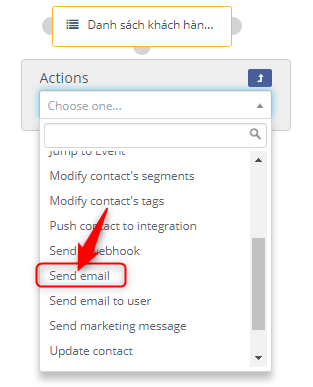
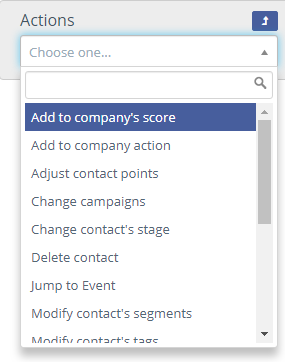
Bước 8: Tại màn hình danh sách các hành động, bạn hãy lựa chọn hành động phù hợp với mục đích của bạn.
Ví dụ: Lựa chọn hành động “Send email” cho chiến dịch

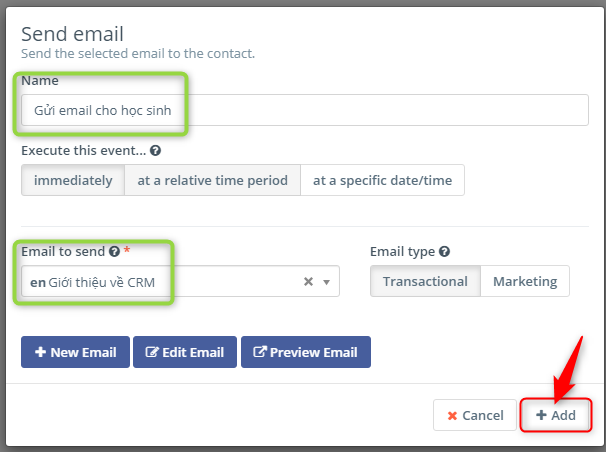
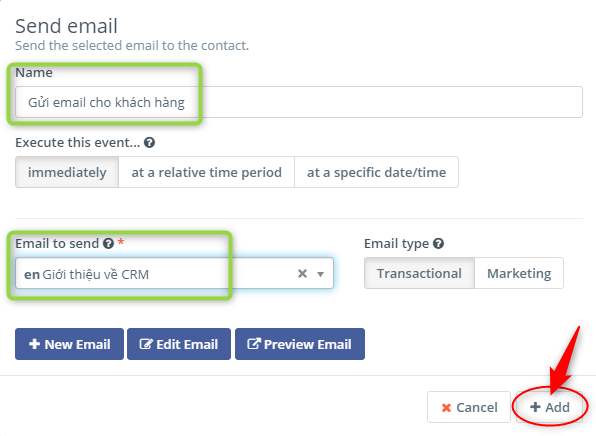
Bước 9: Sau đó tiến hành đặt tên cho hành động và lựa chọn mẫu Email Teamplate cần gửi, sau đó click Add
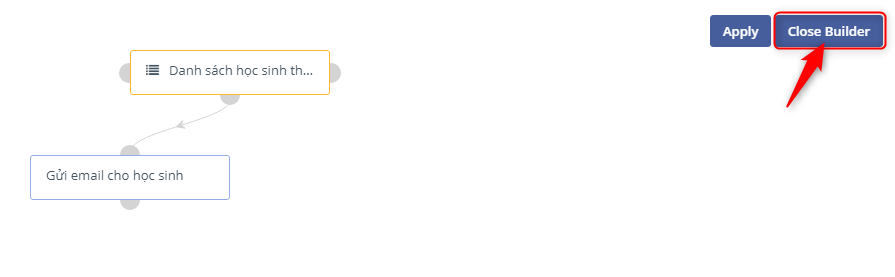
Bước 10: Click Close Builder để hoàn thành
II. Campaign nâng cao
Tiến hành tạo 1 campaign sử dụng các chức năng nâng cao.
Bước 1: Tại menu chọn “Campaigns”
Bước 2: Click “New” để tạo mới 1 Campaigns
Bước 3: Đặt tên chiến dịch, sau đó nhấn “Launch Campaign Builder” để tiến hành cấu hình cho Campaigns
Bước 4: Lựa chọn “Contact Segment”
Bước 5: Lựa chọn Segments muốn sử dụng cho chiến dịch, sau đó click “Add”
Bước 6: Click vào icon +,tại cột Action chọn “Select” để tiến hành thêm hành động gửi mail cho chiến dịch
Bước 7: Tại màn hình danh sách các hành động, bạn hãy lựa chọn hành động phù hợp với mục đích của bạn.
Ví dụ: Lựa chọn hành động “Send email” cho chiến dịch
Bước 8: Sau đó tiến hành đặt tên cho hành động và lựa chọn mẫu Email Teamplate cần gửi, sau đó click Add
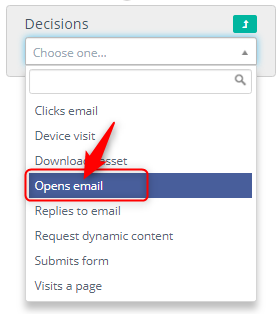
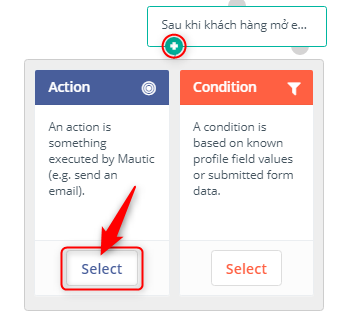
Bước 9: Tiếp theo bạn tiến hành tạo thêm các “quyết định” từ phía khách hàng sau khi email được gửi đi.
Danh sách các hành động:
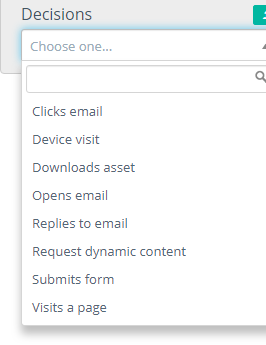
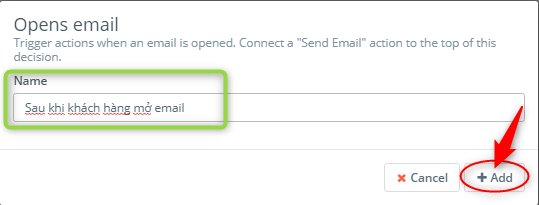
Ví du: Lựa chọn sau khi khách hàng mở email “Open email”
Bước 10: Đặt tên “quyết định” của khách hàng để bạn dễ dàng quản lý
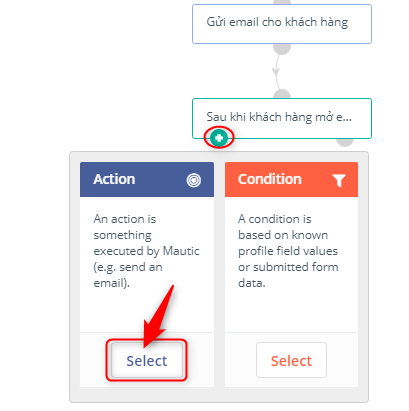
Bước 11: Sau khi khách hàng mở thông tin email bạn tiến hành tạo thêm các hành động tiếp theo.
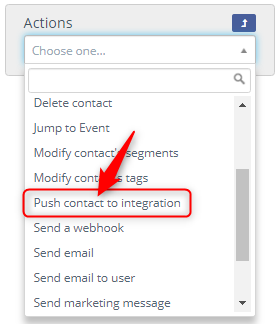
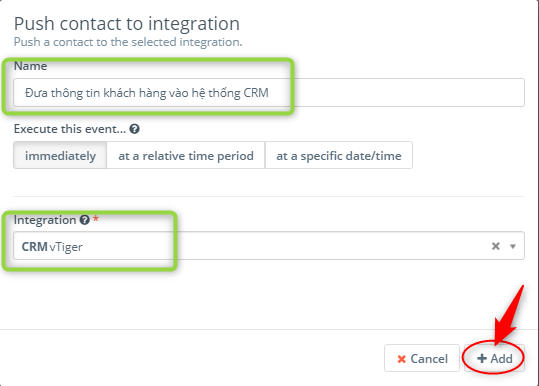
Ví dụ: Đẩy thông khách hàng vừa mở email sang hệ thống CRM
Bước 12: Đặt tên cho hành động
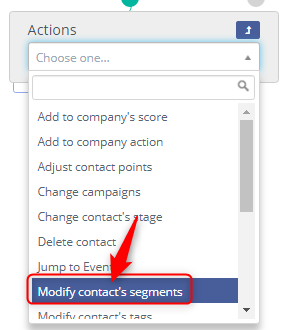
Lưu ý: Để xem được thông tin chi tiết khách hàng nào đã thao tác với email từ chiến dịch bạn tiến hành tạo thêm 1 hành động (thao tác tương tự như ở bước 6 – Bước 8)
Bước 13: Tại cột Action chọn “Select” sau đó lựa chọn “Modify contact segments”
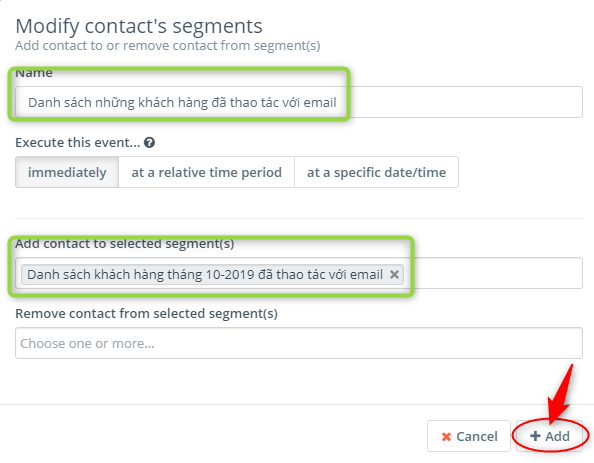
Bước 14: Đặt tên cho hành động vừa được tạo và lựa chọn segments.
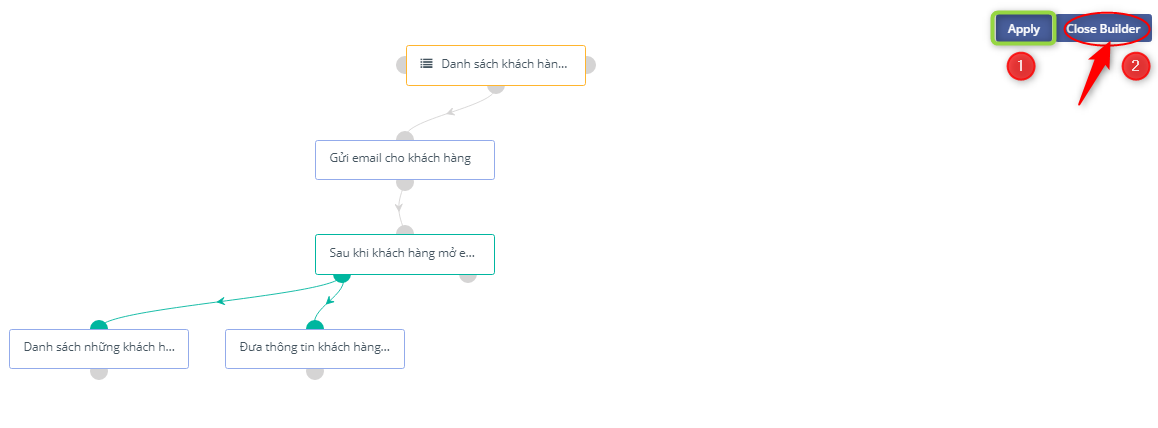
Bước 15: Bạn nhấn “Apply” sau đó nhấn “Close Builder” để hoàn thành việc cấu hình cho Campaigns
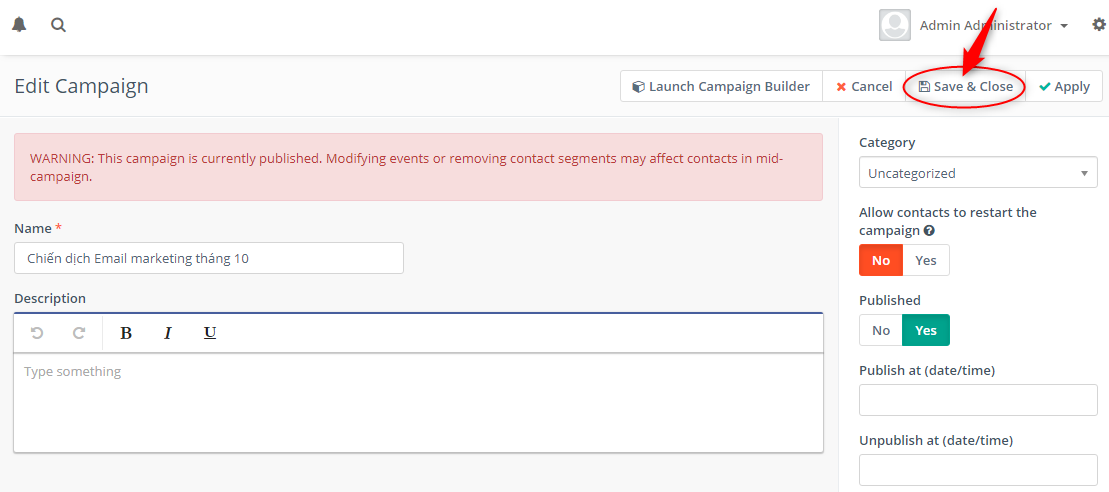
Bước 16: Cuối cùng bạn click “Save & Close” để hoàn thành việc tạo Campaigns